The benefits of FES for foot drop are undeniable. Here at CIONIC, we’re proud to offer highly adaptive, smart, wearable technology that harnesses the power of functional electrical stimulation. One important aspect of using the Neural Sleeve is learning proper electrode placement for foot drop. Here’s some guidance to help you position and tune your sleeve for effective dorsiflexion.
Understanding your anatomy
Lower leg anatomy
- Tibia: This is the long bone running down the middle of your lower leg. You can feel the sharp ridge, known as the Tibial Crest, on your shin. The top of your tibia is the plateau and is part of the knee joint.
- Tibial Tuberosity: A bump just below the plateau and joint-line of your tibia and is found about two inches below your kneecap (patella).
- Medial Malleolus: The bump on the inside of your ankle—this is the bottom-most part of your tibia.

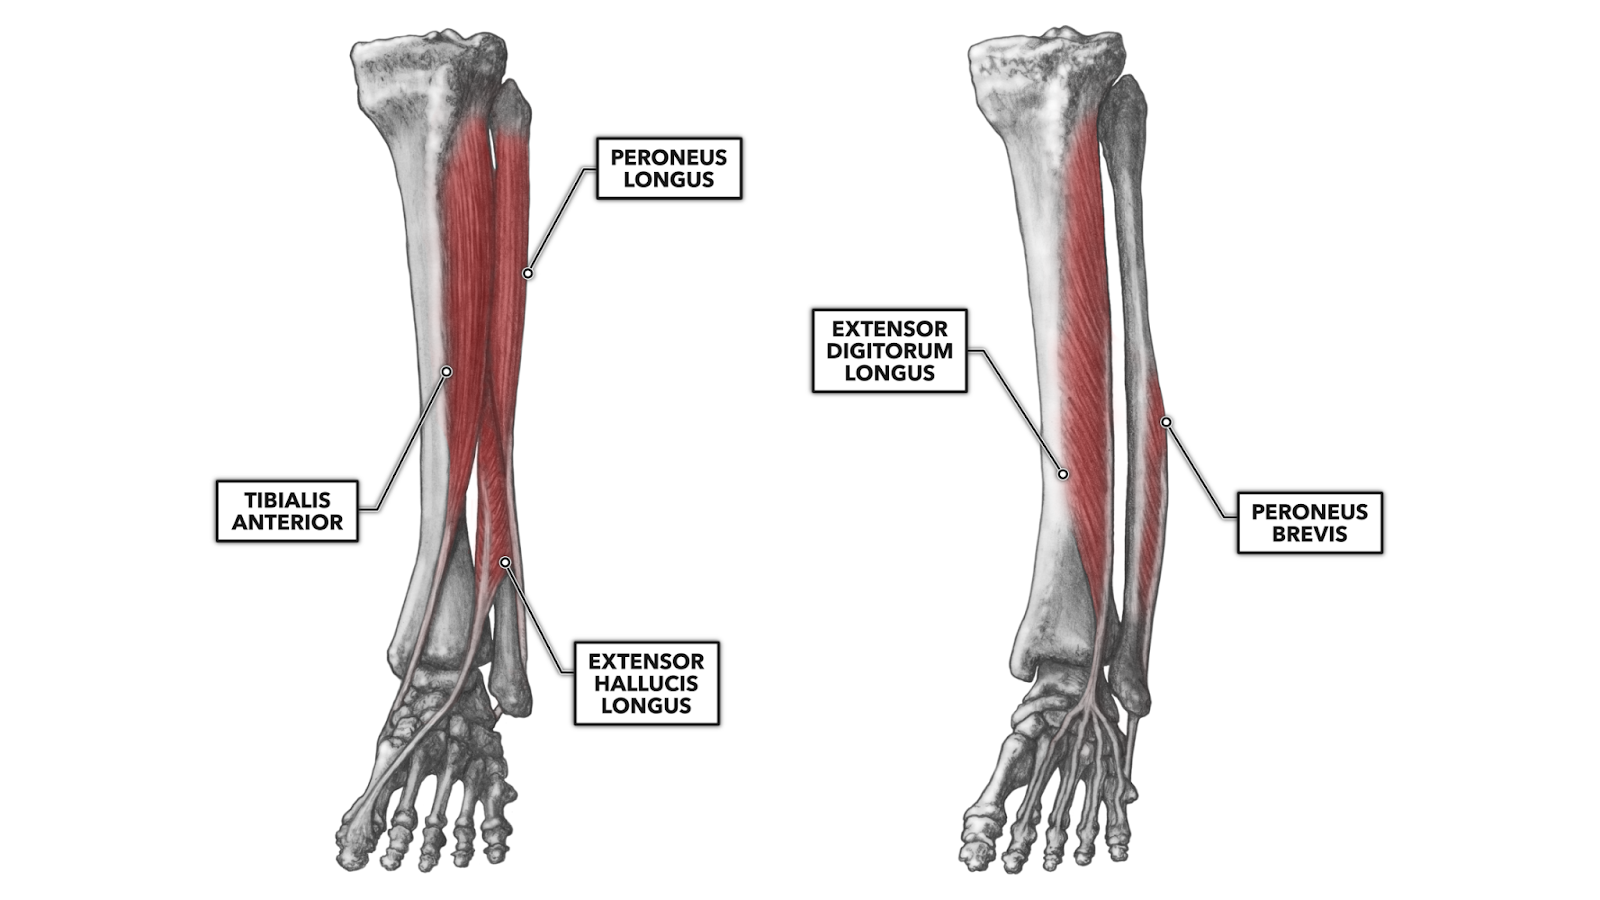
Muscles Involved:
- Tibialis Anterior: Responsible for lifting your foot (dorsiflexion) and turning it inward (inversion). It runs along the front of your tibia and wraps around the inside of your ankle, attaching near your foot’s arch.
- Peroneus Longus and Brevis: These muscles move your foot outward (eversion) and slightly downward (plantar flexion) and run along the outside of your fibula.
Familiarize yourself with these landmarks before proceeding with the sleeve.
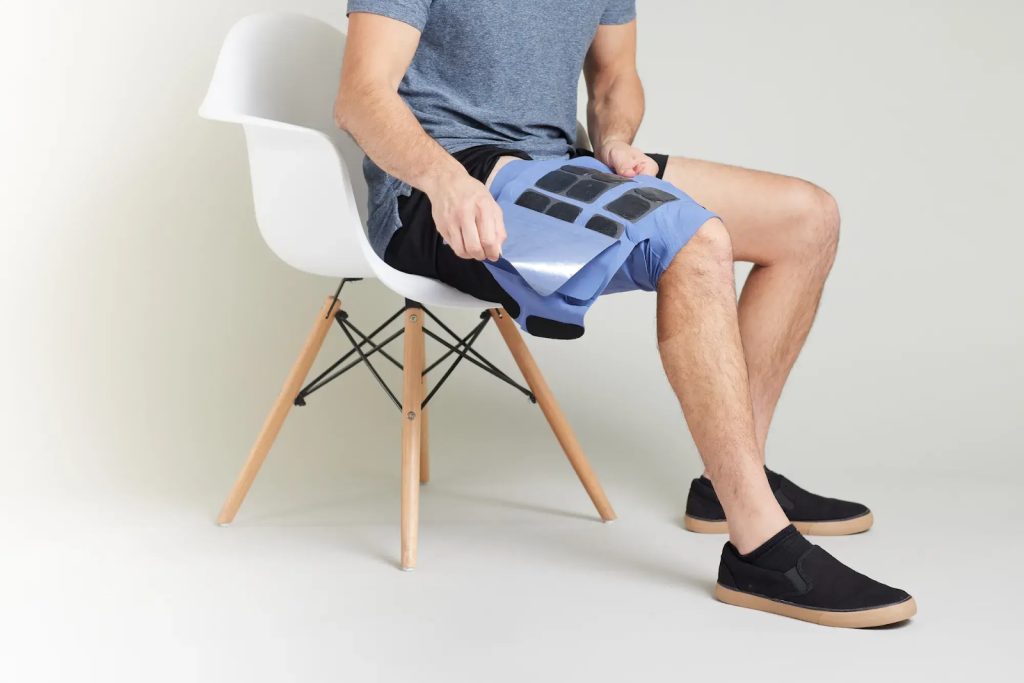
Donning the sleeve
- Find a Comfortable Chair: Sit in a stable chair where you can comfortably place and adjust the sleeve.
- Position the Sleeve:
- Slide your foot through the loop that sits behind your knee.
- Center the oval pattern on the knee of the sleeve over your kneecap.
- Remove the electrode covers from the hamstring and quadricep electrodes to secure the upper part of the sleeve to your leg.
- Place the Shin Electrodes:
- Lay the bottom portion of the sleeve, electrode-side up, on your thigh with electrode covers still on.
- Locate the tibial tuberosity by feeling down from your kneecap about two inches.
- Move your fingers about an inch to the outside of your leg. Mark this spot if needed—it should be at the muscle belly of your Tibialis Anterior. This is where your top, innermost electrode should be placed
- Align the white dotted line on the shin panel of the sleeve with your tibial ridge to place the remaining electrodes. Place the electrodes next to the tibia without overlapping it, targeting the Tibialis Anterior muscle.
- Wrap the sleeve around your lower leg and secure it with the Velcro.
Note: Placement may vary slightly based on adjustments made by your Mobility Specialist. In general, this guide provides a good starting point.
Programming the sleeve
Programming and using the Cionic Neural Sleeve involves a combination of app-based configuration and real-time adjustments (ie. changing the placement) to ensure the device provides effective and personalized responses.
Once we have a preliminary placement, our attention can turn toward programming the sleeve with various electrode configurations and settings.
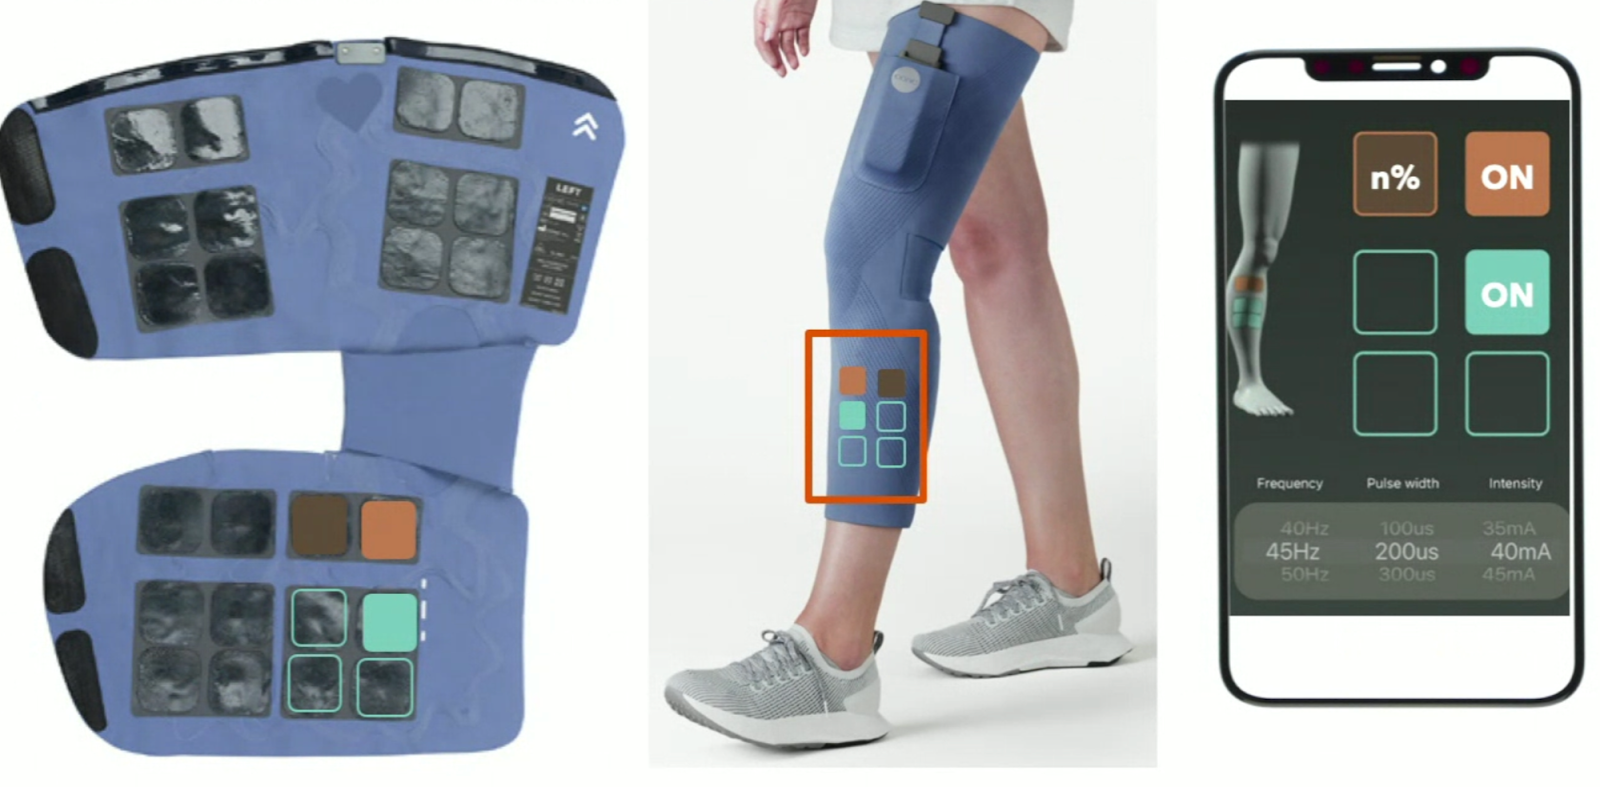
On the shin panel of your sleeve, there are two positive and four negative electrodes. The positive electrodes are displayed in orange (or outlined in orange if turned off) in your app. In order for the stimulation to deliver, one positive and one negative electrode needs to be turned on to 100% (not 100 mA) at all times.
The panel of electrodes closest to your tibia will be the panel primarily responsible for dorsiflexing and inverting your foot. The panel on the outermost part of your shin will be responsible for eversion.
Checking for correct electrode placement
A way to check that you have your sleeve placed in the correct position is to test each panel of electrodes.
- Turn on the three electrodes closest to your tibia and begin to turn the intensity up in increments of 10 mA. Test with the lightning bolt button after every increase of 10 until you generate a muscle contraction and see your foot move.
- Your foot should move up and in. If your foot only moves in and you do not achieve any lift, try moving your sleeve a small amount towards the outside of your leg and try again.
- Now, try the other panel. Turn on the three electrodes on the outside of your shin. Increase the intensity 10 mA at a time until you generate a muscle contraction. Your foot should move out and maybe slightly down.
The goal of the electrodes on the shin is to lift your foot into dorsiflexion. Some individuals may also benefit from a slight amount of eversion to stabilize the ankle. To achieve the correct electrode placement for foot drop, you may need a combination of shin electrodes from both panels.
Setting up shin stimulation to achieve dorsiflexion
When setting up the shin stimulation to achieve dorsiflexion, you can start by turning on the top two electrodes over the tibialis anterior. From there, increase the intensity in increments of 10 mA until you generate a muscle contraction. Depending on the motion you see, add more electrodes from there to get the desired movement.
Generally, you will not need to have all of the electrodes turned on but will need a combination of electrodes on both panels. While you are troubleshooting the movement, if you turn any electrodes off, be sure to turn down the intensity a bit. This is because once you turn an electrode off, the same amount of current will still be delivered. It will just be consolidated between fewer electrodes, which may make it uncomfortable.
You might find yourself in a situation where keeping one of the electrodes turned on generates too much movement in the wrong direction and turning that electrode off doesn’t generate enough movement. In this case, you can turn an electrode on partially.
To do this, press and hold the electrode on your app, and a sliding bar will appear. This will decrease the output from this electrode by whatever percentage you select, allowing you to fine-tune the movement further.
Electrode placement for foot drop: common dorsiflexion configurations

While the first three sample configurations above are simple, let’s touch on the last three. You can see that there are a few electrodes that are not filled in completely—this shows that those electrodes are only turned on at a partial percentage.
To adjust the output of a given electrode, you can press and hold the square, and a bar representing the percentage will appear. Turn that percentage up or down to fine-tune your dorsiflexion movement!
It is worth noting that the sample configurations are all for a right-legged sleeve (though the model is of a left-leg) and the panel on the left represents the electrodes placed directly over the Tibialis Anterior right next to the Tibia. You can think of the graphics on your app as side-by-side images and reference the model for the panel you are adjusting.
Sleeve care
How you care for your sleeve can significantly impact the effectiveness of your dorsiflexion response. One common sign that gel pads are worn out is a noticeable decrease in their ability to elicit muscle contractions. You might experience discomfort during stimulation, receive adherence errors from the app indicating inadequate contact with your skin, or find yourself needing to increase the intensity to achieve the desired response.
When you replace the gel pads on your sleeve, it’s essential to inspect the metal electrode buttons underneath. Gel residue can sometimes accumulate on these buttons, which might make them appear as though they are rusting—this is not the case. Thoroughly cleaning this residue is crucial for effective stimulation delivery. Use a cloth with rubbing alcohol or a Clorox wipe to clean the buttons, but avoid abrasive or harsh chemicals that could damage the protective coating on the metal.
After replacing the gel pads and ensuring the metal buttons are clean, proper storage of your sleeve is important for maintaining the life of the electrodes and the effectiveness of the stimulation. Always cover the gel pads with the provided electrode covers and store the sleeve in a ziplock bag in a cool, dry place.
Reporting an issue
Remember, our support team and engineers are here to help you when you need us! You can report an issue in the CIONIC App and someone from our team will reach out to assist you. To do this, make sure your Control Unit is turned on and connected via Bluetooth to your phone.
Then, navigate to the “hamburger” menu in the top left corner of the app and select “Report an Issue”. Here, type a brief description of what you are experiencing and press “submit”! Once a member of our Customer Care team sees the report come through, they will reach out with next steps and pass the report along for investigation by our engineering team.
Final notes on electrode placement for foot drop
CIONIC’s technology integrates advanced engineering with everyday wearables to support and improve the lives of individuals with upper motor neuron disorders. It requires training and practice to use effectively and know the proper electrode placement for foot drop. With time, you will become proficient in using your Cionic Neural Sleeve to enhance your daily life.
As always, you can reach out to support@cionic.com or your mobility specialist with questions and we are happy to schedule an appointment with you for additional training.
Please take the assessment if you are not a current customer and are interested in learning more about the Neural Sleeve.